
Make Your Own Ghee
Ghee originated in India at a time when cattle domestication and butter consumption had become widespread. The hot climate made the storage of butter difficult; the removal of milk solids from the butter, through boiling, resulted in a fat with a longer shelf life. From these practical beginnings ghee became a highly valued substance with references in spiritual literature as far back as 1500BC describing it as a food fit for the gods.1
In Ayurvedic medicine (the traditional Indian system of medicine) ghee is recognised for its anti-inflammatory soothing qualities. It aids digestion, improves the absorption of nutrients and promotes mental clarity and wellbeing. It is also used as a salve to soothe burns and nourish dry skin and hair. Rich in the fat soluble vitamins A, D, E and K, ghee contains healthy fatty acids including omega 3, 6 and 9.
Ghee is simple to make at home and is a safe fat to cook with due to its high smoke point. The process of making ghee separates the whey from the butter fat, leaving behind a beautiful golden coloured fat which can tolerate high temperatures.
Choose organic butter when making ghee to avoid contamination with antibiotics and synthetic growth hormones.2 The butter should also be unsalted for the process to be effective.
Method
The quantity of butter used is a personal choice – how much ghee would you like? The volume of ghee produced is slightly less than the butter you start out with due to the removal of the whey solids. This recipe is for 1 pack of butter – the more you have the longer you will need to let it simmer. Ghee stores well (particularly in the fridge) so you can make enough to last several months at a time.
Place the butter into a saucepan over a medium heat.
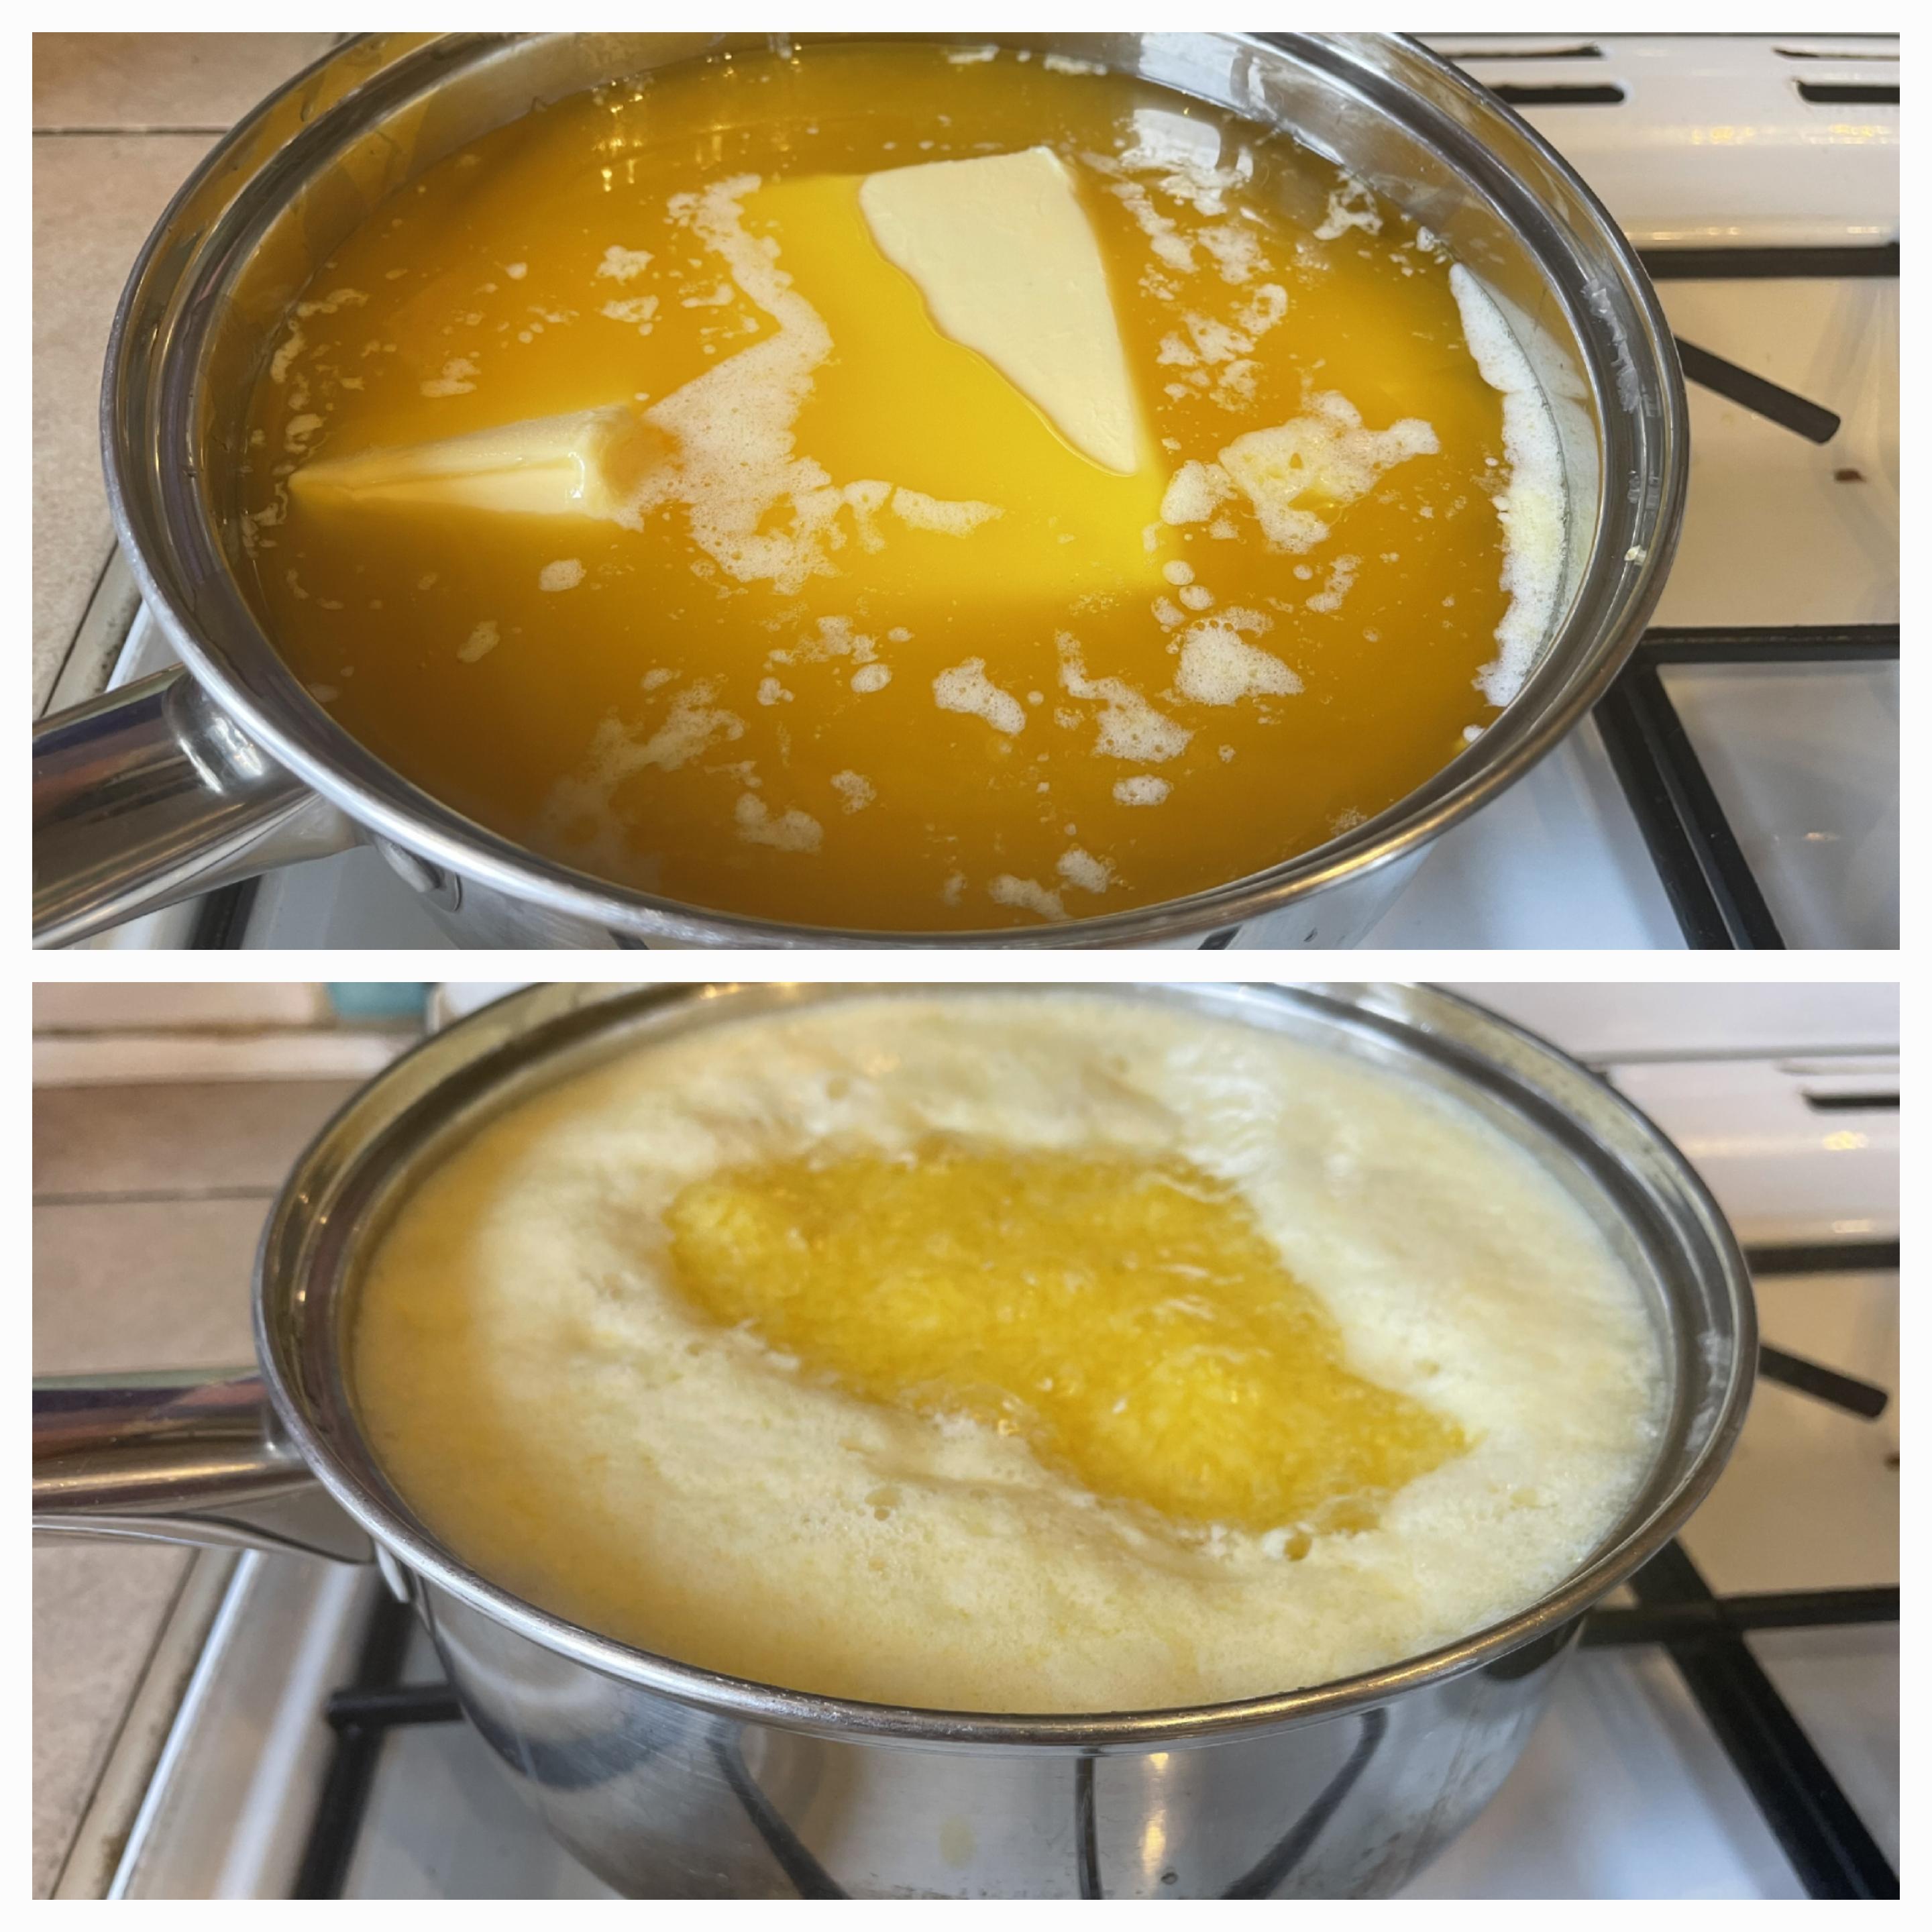 Allow the butter to melt and come to the boil, then reduce to a gentle simmer and leave for around 15-20 minutes.
Check the butter periodically for progress. Initially, the butter will foam and you will see white milk solids in the pan.
Once the ghee is nearly ready the milk solids will separate, becoming firm and settling on the bottom of the pan or rising to the surface.
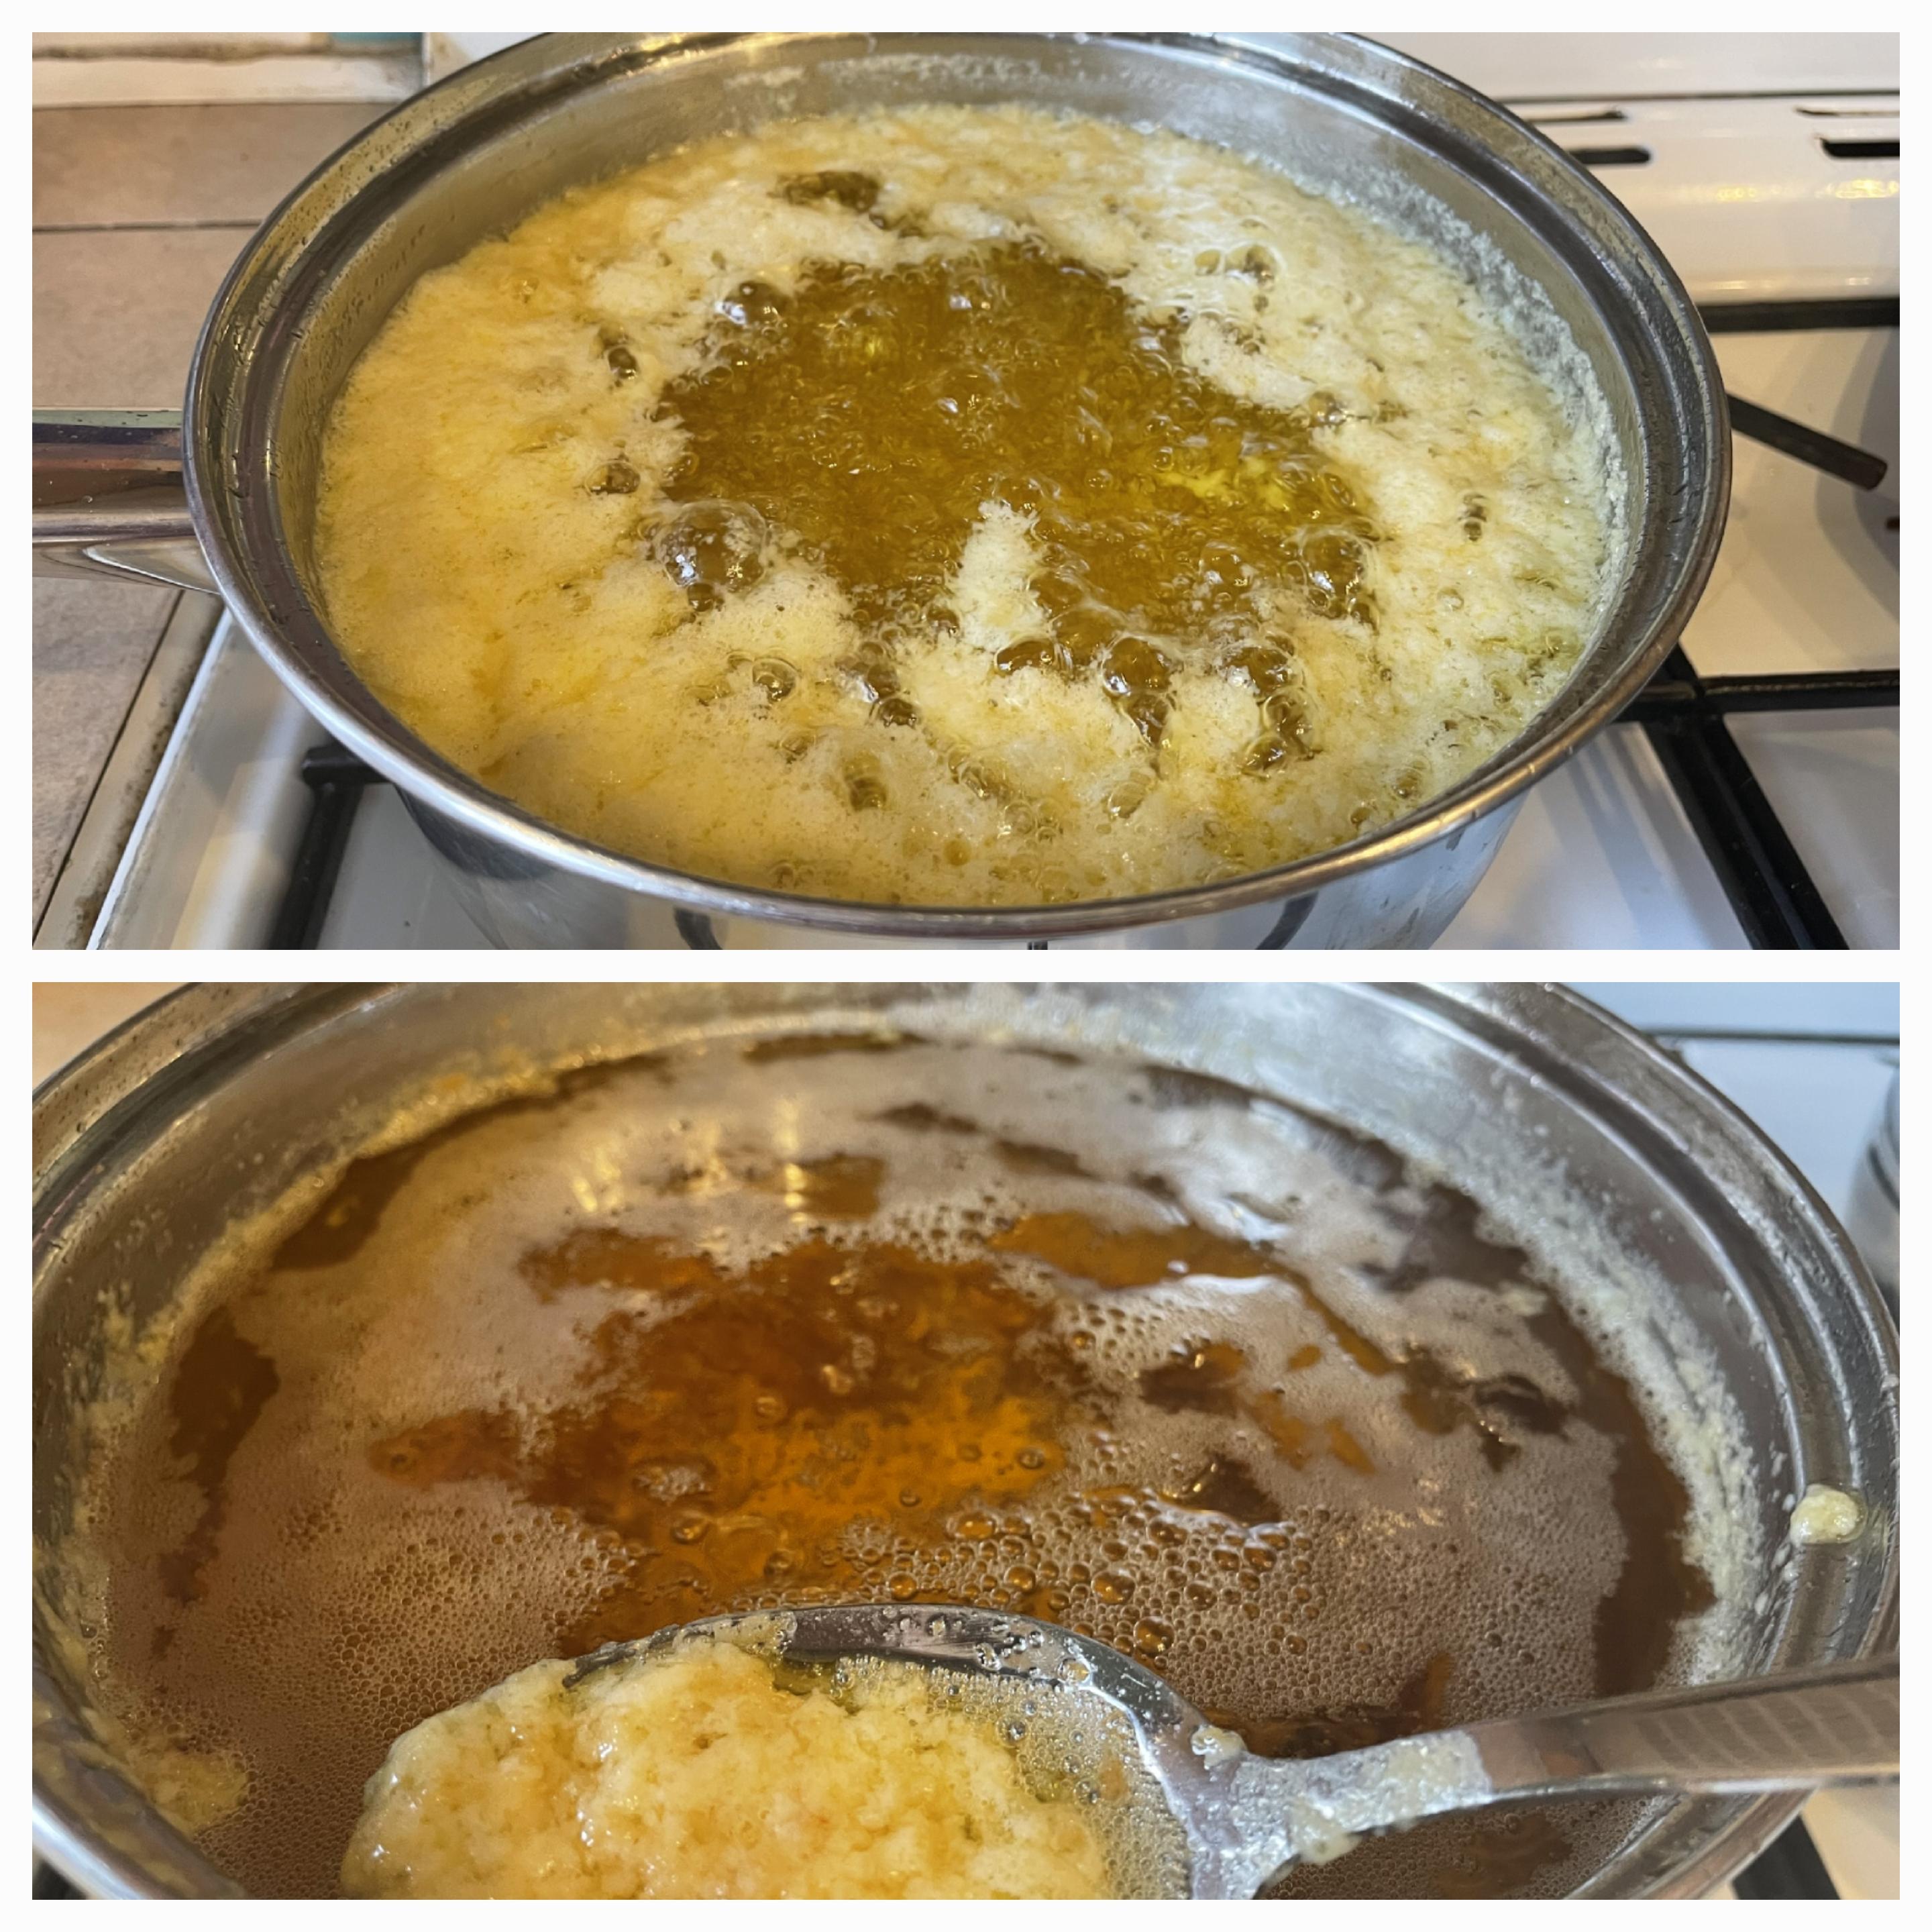 When ready the ghee will be a clear golden colour. Allow the milk solids on the bottom of the pan to turn a golden brown (not burned) to give the ghee its distinctive butterscotch flavour. Ghee can also be strained before the milk solids turn brown, at which stage it is classed as clarified butter.
Turn off the heat and allow to cool for a few minutes before straining the liquid through a sieve lined with muslin or coffee filter paper into a heatproof jug. If you have a steady hand you could use a tea strainer in the sieve rather than the muslin.
 Pour into a clean jar and allow to cool with the lid off to allow any moisture to evaporate.
Enjoy your ghee in curries, to sauté vegetables, melted on buckwheat pancakes, in porridge or anywhere you like!
- Ghee – an Ayurvedic perspective
- Public health – nutrition. Production related contaminants, pesticides, antibiotics and hormones in organic and conventionally produced milk samples
The ‘Herbal Clinic’ in Swansea provides natural medicine healthcare with the use of organic herbs, acupuncture and iridology.

This Post Has 0 Comments